Fixing Connection Issues by Flashing ESPHome on Shellys OTA
My house is flooded with smart relays from Shelly.
- I use multiple Shelly 2.5 to control all the covers in my house
- I use a Shelly 1PM to keep track of the production of my balcony power plant
- I use many Shelly 1 to automate my light switches
I have at least 30 smart relays around my house/garden and they work flawlessly! But then there are one or two relays that give me headaches. Especially the one controlling the lights at my stairs. These lights are motion-controlled and I expect them to go off 3 minutes after all motion cleared. But over the last couple of weeks, this has not been happening.. This is very annoying since I had to get out of bed and switch them off manually.

So I checked the Home Assistant logs regularly to find the root cause. But all I found was the generic error DeviceConnectionError().
Then I stumbled on something interesting in the ESPHome docs:
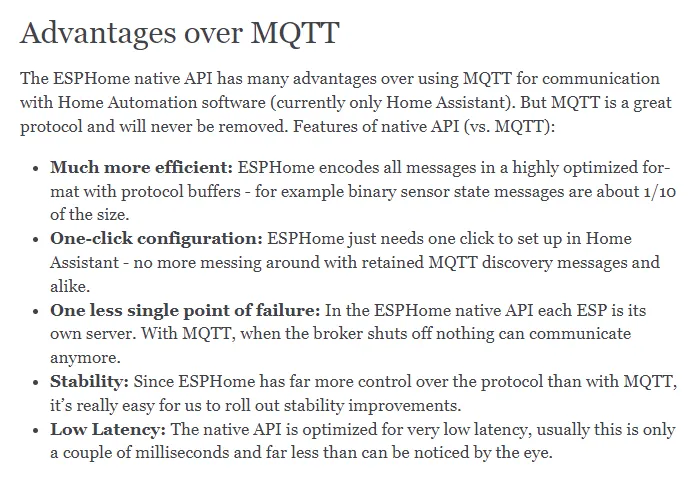
That’s why I decided to give ESPHome a try and looked for a way to flash ESPHome onto my Shelly 1. Maybe this might finally fix the connection errors! Let’s get going!
Creating the ESPHome firmware
Go to ESPHome and add a new device. We do not need to connect our Shelly to the computer since we can do everything OTA (over-the-air).
Click on edit and insert and tweak the following configuration to fit your needs:
# Basic Config
esphome:
  name: stairs_light_shelly
  platform: ESP8266
  board: esp01_1m

wifi:
  ssid: !secret wifi_ssid
  password: !secret wifi_password

logger:
api:
ota:

# Device Specific Config
output:
  - platform: gpio
    pin: GPIO4
    id: relayid

light:
  - platform: binary
    name: "stairs_light"
    output: relayid
    id: lightid

binary_sensor:
  - platform: gpio
    pin:
      number: GPIO5
    name: "stairs_light_button"
    id: switchid
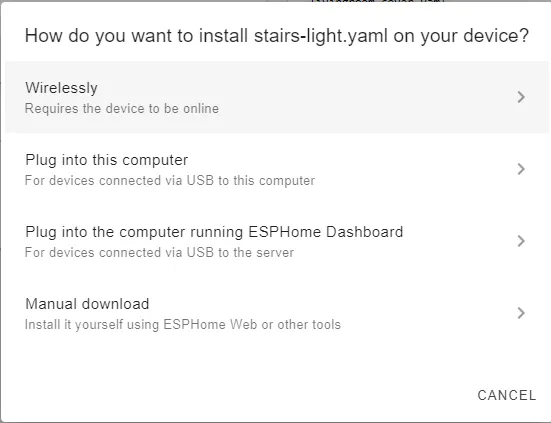
Hit save, click the 3 dots and select install. Choose Manual download and download the firmware file in modern format.
After the file was created and downloaded, we have to zip it since the file would be too big to upload it onto the Shelly 1. I use 7-Zip for that. Simply right-click the file and compress it to gzip!
You should now have a Shelly 1 ESPHome firmware with extension .bin.gz on your drive.
Flashing Tasmota as intermediate firmware
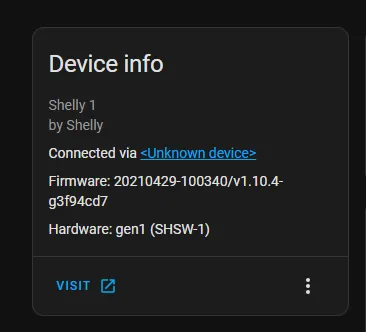
Check which IP is assigned to the Shelly you want to flash. You can see this in your router or by clicking Visit from inside Home Assistant.
Check the table in this repository. In case of a Shelly 1 you’d have to enter the following URL into the browser:
http://YOURIPADDRESS/ota?url=http://ota.tasmota.com/tasmota/shelly/mg2tasmota-Shelly1.zip
This will flash Tasmota onto your Shelly.
After 2 minutes you should see a new WiFi network with a name like tasmota-XXXXX. Connect to it and head over to http://192.168.4.1
Here you can enter your WiFi credentials and hit save. Tasmota will now connect to your WiFi.
Flashing our ESPHome firmware
Go back to the IP address of your Shelly. You should see the default page of Tasmota.
Now it’s important to click on Console and enter
SetOption78 1
The console should confirm that you enabled the option 78. This enables us to flash firmware files that are not Tasmota builds.
Now head back to the main menu, select Firmware Upgrade and upload the firmware file we created previously. Start the upgrade! If everything worked out you should get a success message.
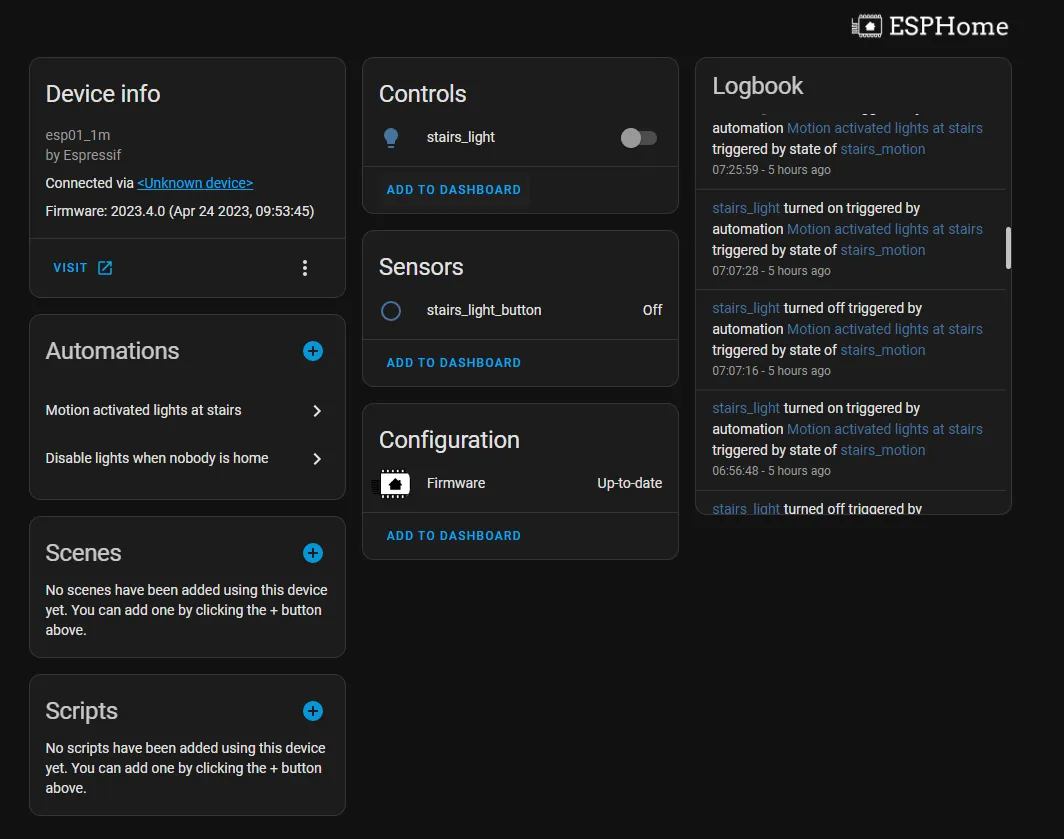
Integration into Home Assistant
After a short time (or a forced restart of Home Assistant), you will receive a notification that a new ESPHome device has been discovered — automatically!
That was easy.
Summary
It is possible to flash ESPHome onto many kinds of Shelly smart relays simply over-the-air. For me this fixed the connection issues I had with a specific Shelly 1.
This tutorial might help you if you are trying to solve the same problem!